Blender 2.79 Archives

How to drape cloth in Blender

Cloth2

Blender has an excellent physics engine that can simulate cloth – among a great many other things. Blender does this using a modifier: all we have to do is declare one object as being “the cloth”, and other objects as the ones colliding with the cloth.

Let’s see how in this quick example.

Read more

Grouping and Parenting in Blender

If you’ve used grouping or parenting in other applications, it may throw you off guard how Blender thinks about those things. A little explanation is in order to bring clarity to our cluttered 3D minds. Usually we can group objects together so that when we select one object, all others in the group are selected at the same …

Read more

How to render with Depth of Field in Blender Render

Blender-DOF

The Blender Render Engine uses postwork to create a depth of field effect, much like Carrara does. The advantage is that after a long and complex render, depth of field can be applied after the fact without having to re-render.

I must admit that rendering with depth of field in Blender is not for the faint-hearted – I thought it’s best to take some notes while I still remember how it works (using version 2.7.3). Note that this will only work for the Blender Render Engine, not for Cycles.

Read more

How to render Motion Blur in Blender

Motion Blur is the illusion of moving objects in still images. 3D applications create this effect usually by rendering several images of an animation and mixing them together as a blend effect. This is in contrast to an ordinary still image in which everything appears is focus as if it was shot with very fast film …

Read more

How to constrain an object to a Motion Path in Blender

Carrara has a concept of Motion Paths. Those are bezier curves to which another object can be constrained during animation. I’ve described how to use them in this article. Blender has the same concept: create a curve (any curve will do), then add a Clamp To constraint to your object using the curve. Here’s how …

Read more

How to create keyframe animations in Blender

Keyframe Animations work a little differently in Blender than in other packages I’ve used. It all makes sense and is very intuitive – but I fear I might forget this, so here’s a quick guide on how animations work in Blender. At the bottom of the interface is the standard timeline. Move the green line …

Read more

How to apply textures in Blender (with Blender Render)

Adding textures in Blender depends on which render engine is used. In this article I’ll discuss how to do this for Blender Render. I’ll explain how to do this with Cycles in another article. It’s easier to make a texture appear in Blender Render. Make sure it’s selected as the render engine at the top of the …

Read more

How to assign Materials in Blender (Blender Render)

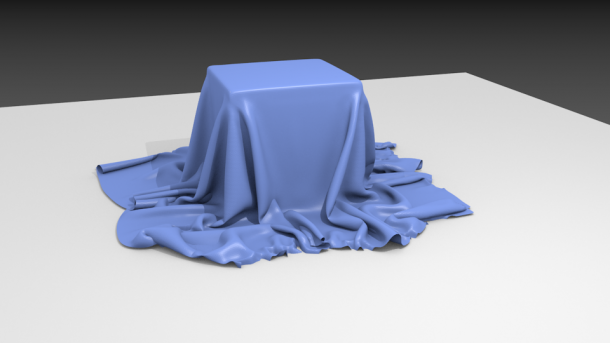
Materials are closely related to Textures in 3D modelling: they describe the surface properties of an object, or parts of an object. Which colour it has, if there are any texture maps applied, how shiny it is, how rough it is. That sort of thing is described via Material Properties. Other 3D applications may call them Shaders or Surface Properties.

Blender calls them Materials, and here’s how to assign properties to them. The actual properties you get depend on which rendering engine is used: Blender Render or Cycles. I’ll stick with the traditional Blender Render in this description. I’ll discuss how to do this for Cycles in this article.

Select an object and head over to the little shiny ball icon in the Properties Palette on the right hand side. The icon is located between and upside-down triangle and a checkerboard icon.

Screen Shot 2015-04-15 at 14.34.41

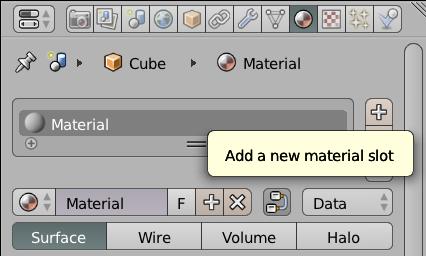
By default Blender creates a default grey material. Feel free to amend it, or add a new material to this list by clicking the little plus icon to the right of the materials list. This  creates a new slot. Now click Create Material to proceed.

Screen Shot 2015-04-15 at 14.40.56

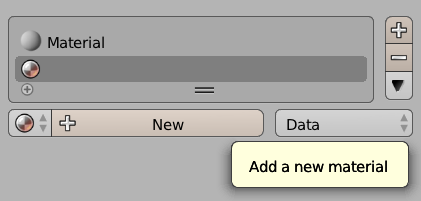
Give it a nice name, then pick a Diffuse colour to change the appearance of your entire object. You’ll even see a nice preview of your new material.

Screen Shot 2015-04-15 at 14.45.54

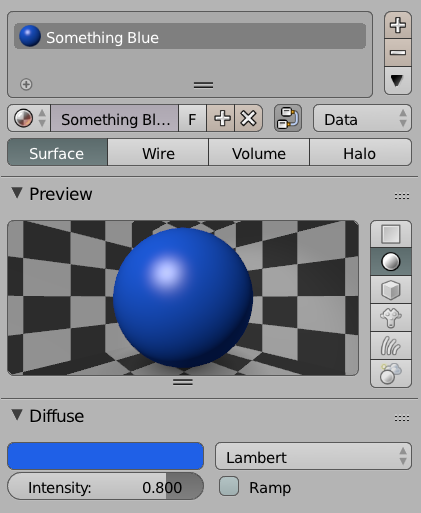
See where it says Lambert? Pick something else and see the effect. This describes the basic reflective properties of your object – it’s a Blender internal thing, so it won’t matter when you come to export your object for use in another 3D application.

Read more

How to point the camera at an object in Blender

Other 3D packages usually have a camera setting that allows us to “point at” an object. This can be either part of a scene or a null object which doesn’t show up but can be animated. The idea behind this is that no matter where you move the camera, it will always frame your object of …

Read more

How to use Sculpt Mode in Blender

Blender has an excellent Sculpting Mode that works very similar to Sculptris and ZBrush. It’s very easy to sculpt on a mesh – let me show you how. Create a Mesh Object with a decent amount of topology for sculpting. For example, use Add – Mesh – Ico Sphere. In the init menu on the left, set the …

Read more

How to use Soft Selections in Blender

Soft Selections are those that influence more than what you have selected for a more organic and natural influence around an area. In Blender this concept is called Proportional Editing and it’s disabled by default. To enable it, while in Edit Mode, select SHIFT-O (as in the letter). There’s also a little circle icon which …

Read more

How to apply a Modifier in Blender

Modifiers are forces that act upon your vertex objects, with the added advantage that you can manipulate them later. Carrara has the same concept. Here’s how to create a Modifier in Blender. First, select an object in your scene. Underneath the scene tree, find the little wrench icon and click it. This opens the Modifier Pane …

Read more

Creating selections on Vertex Objects in Blender

To edit a vertex object in Blender, we must first switch into Edit Mode. By default a scene is in Object Mode. Select an object by right-clicking it, then switch into Edit Mode by using the drop-down (or drop-up) menu. The entire object may be selected, which is not exactly what we want. Hit A …

Read more

Creating Primitives in Blender

To create a new primitive in Blender, select Add – Mesh from the bottom menu. Alternatively, select SHIFT-A to bring up a similar context menu anywhere on the screen. Pick your poison and it will be inserted into your scene wherever the 3D cursor is located (that weird little red-white ring-thing). You can position the …

Read more

Navigating 3D Space in Blender on Mac

Using Blender with the integrated Magic Trackpad on my MacBook works a treat – it’s  intuitive even! It’s a nice surprise in the otherwise daunting user experience Blender has to offer. Here’s how to navigate a 3D scene using gestures: Rotate using two-finger swipe Zoom using two-finger pinch, or the PLUS and MINUS keys Pan by holding …

Read more