Blender 2.79 Archives

How to add margins between UV islands in Blender

When UV islands are packed too tightly together, there’s little to no room between them. That’s great because it makes use of every available pixel on the UV Map, however when it comes to texturing in Photoshop, selecting separate islands is very difficult. Blender has a nice feature that lets us add a margin in …

Read more

How to turn a mesh into a path in Blender

Not all 2D shapes are created equal in Blender: create a circle via Add – Mesh – Circle and it will be fundamentally different to creating one with Add – Curve – Circle. Even though, they look exactly the same in the viewport. The trouble begins when you want to do path related things on 2D …

Read more

How to split and detach viewports in Blender

By default Blender has one window with multiple interface sections: the main viewport, the properties panel, the outliner, and so forth. We can easily create more of those sections by clicking on the little triangle in the top left corner of a window and drag left or down. Likewise, we can collapse those windows by …

Read more

How to upgrade Blender while retaining your settings

In this episode I’ll show you how to upgrade to a new version of Blender and copy your settings from a previous version. Blender is a bit “special” in that it does not automatically overwrite an existing version, instead it installs the new version alongside the old version. The idea is that if the new …

Read more

How to copy and paste materials in Blender

chocolates-gpu-render-37mins

Sometimes you want to use the same material on another object and only make a small change to it. Rather than this change affecting all linked objects, we need a new material with all the settings of the old material.

For example, in the above image I’ve used three chocolate shaders. They were all the same, except for the colour of the chocolate. I started with milk chocolate, then changed the colour for the dark and white chocolates.

There is an easy way to do this in Blender, albeit not entirely obvious at first sight. Let me show you how to copy and paste materials in this article.

Read more

How to render the current viewport in Blender 2.79

In other 3D applications, it is common to “look through” a camera to position and manipulate it with the usual viewport controls, and then render the result. In Blender things are a little different (of course). We can manipulate the viewport, but we cannot render it. We can see it rendered as a preview, by …

Read more

How to use Normal Maps in Blender (Cycles)

When we setup a standard material for Blender’s Cycles render engine, it’ll start with just a single diffuse node like this: To add a Normal Map to this setup, we’ll need to add two things: a new Texture Map node (Add – Texture – Image Texture) a new Bump Map node (Add – Vector – Normal …

Read more

How to use Bump Maps in Blender (Cycles)

When we setup a standard material for Blender’s Cycles render engine, it’ll start with just a single diffuse node like this: Feel free to change the diffuse colour or add a texture map to it’s colour input. To add a Bump Map to this setup, we’ll need to add two things: a new Texture Map …

Read more

How to use First Person Navigation in Blender

In large scenes it can be handy to navigate as if we’re playing a 3D computer game. And that’s possible in Blender: Hit SHIFT+F to enter First Person Navigation mode, then use your mouse to look around in 3D space. Now use the following keys to move around your scene: Left Cursor (or A) – move left …

Read more

How to add Material Zones to an object in Blender

screen-shot-2016-10-03-at-18-07-59
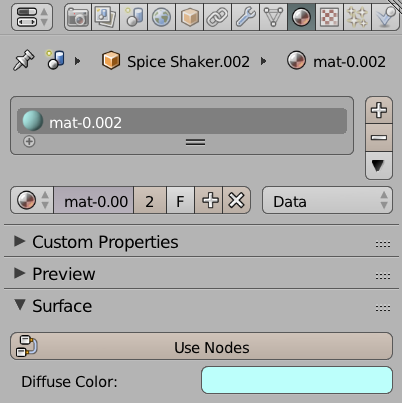
Material Zones are – as the name suggests – different parts of a single object that can each be assigned a shader. This sounds more complicated than it actually is.

In a nutshell, you can tell an object that its top should look different than its bottom at render time – figuratively speaking.

Such zones can be assigned only at the modelling level, so that each surface can be described differently by your rendering app. Here’s how to assign these Material Zones in Blender.

Read more

How to export only selected objects in Blender

By default Blender exports every item in your scene when you choose File – Export. That’s not so good if you only want to save out a small portion of a large scene. But it doesn’t have to be that way: there’s the often overlooked Export Options on the right hand side, on the same …

Read more

How to add textures to a sculpting brush in Blender

Detail

Blender allows us to sculpt with textures to add fine detail to each brush stroke. In ZBrush this feature is called sculpting with alphas, but the principle is a little easier to understand in Blender (at least for me). Here’s how to add a texture to a sculpt brush in Blender. 

Read more

How to use the Screw Modifier in Blender

Screw

The Screw Modifier in Blender is very straightforward to use – if you know how. I tried to figure it out by myself which proved impossible. I guess unintuitive is the word I’m looking for. Reading the manual gives us an explanation like this:

The profile should be properly aligned to the cardinal direction of the object rather than to the screw axis.

Yes… this means what exactly? Thick people shouldn’t use this tool? Thankfully it’s far simpler than it sounds – let me show you how. 

Read more

How to use Boolean Operations in Blender

Blender uses a Modifier for boolean operations. Those can be used to cut into an existing object or combine two objects. In this example we’ll cut a hole into our default cube. Select the object you’d like to cut into, but have another object in your scene. We’ll use a cylinder that’s slightly smaller yet …

Read more

How to duplicate an object along a path in Blender

Cube Necklace

Hexagon had a nice feature called “copy on support”. With it we can create duplicates of
an object along a path, something that comes in handy when creating a ladder or a necklace. I wondered if Blender too had such a feature, and of course it has – even though it’s perhaps a little bit unintuitive (read: impossible) to figure out. Pretty much like the rest of Blender.

So here’s what we have to do in order to duplicate an object along a path in Blender, where this technique is called DupliFrames. Don’t worry about looking it up in the plethora of menus – it’s not to be found anywhere.

Read more

How to use Proportional Editing (Soft Selections) in Blender

Porportional-Editing

Proportional Editing is what Blender calls a tool with which you can modify part of your object with an area of influence around your selection. Other apps would call this Soft Selections. The principle is the same: pick a selection, and rather than just move the selection, you have influence over an area of gradual falloff.

In the above GIF I’ve selected a single face in the middle of a grid. Without proportional editing, only the face is moved. With proportional editing, the whole area around it is moved. Let’s take a look at how to use this tool.

Read more

Blender Keyboard Shortcuts

Here’s a list of shortcuts for use in our Blender adventures. These become second nature very quickly, but when you’ve been away from Blender for a while it’s really easy to forget them all. So while they’re in my mind, here’s what my brain currently knows and likes.

Read more

How to chamfer edges in Blender

You can chamfer edges in Blender using the Bevel Tool (from the Edge menu). To do this, enter Edit Mode and select one or more edges on your object. Hit CTRL+E to bring up the Edge Menu and select Bevel. Alternatively, hit CTRL+B to enter Bevel mode immediately. Now move your mouse and the an …

Read more

How to use the View Selected shortcut in Blender on a Mac

On standard Mac keyboards and laptops, some of the handy Blender shortcuts are hard to find. That’s because many of them rely on us having a full-size keyboard or an additional Number Pad. While those aren’t expensive, some of us just don’t want to use another gadget that clutters our desks (be that at home or in our coffee shop).

One of the many useful shortcuts in Blender is View Selected. It frames the selected object(s) and lets us tumble the camera around them. View Selected is accessible from the View menu, and by default it’s mapped to NUMPAD + . (the period key on the number pad). I do this a lot, so I really want this as a usable shortcut on my keyboard. But the default doesn’t work, because I don’t have a  Number Pad.

There is an option under File – User Preferences that lets users like me emulate one, and it works with most keyboard shortcuts – but NOT for the View Selected shortcut. I have no idea why. Fact.

So what can we do, if we don’t want to invest into more hardware? Re-mapping the keyboard shortcut to something usable springs to mind. Thankfully, Blender is endlessly customisable. Let’s see how we can assign our own shortcut to the View Selected option.

Read more

How to set the origin (pivot point) in Blender

Every 3D object has a point around which it rotates or scales from. It’s usually the point at which the 3D manipulator gizmo shows up. In Blender this point is called the Origin. In my screenshot, that point is at the top of the selected book. But perhaps I’d like to move it to the …

Read more

Joining and separating objects in Blender

Joining objects in Blender means that two different meshes can become part of the same object. This sounds like it’s related to grouping and parenting, but it’s more useful in modelling. Think of a complex object made of several primitives: rather than having a hierarchy in Object Mode, you’ll have a single object with multiple linked …

Read more

How to use Reference Images in Blender

Reference images are nice if you’re modelling something from scratch: take pictures from the front, the back, the sides, and then use them to create a 3D model with all those fancy extrusion tools and what have you. Trouble is, how do we get them into Blender as a backdrop? Let me show you, before I …

Read more

How to add thickness in Blender

Adding thickness or depth to an object is easy in Blender, thanks to its lovely Solidify Modifier. It’s as easy as adding the modifier to your object and changing the properties – you can even do this while you’re still working on the geometry. Let me show you how to do it. For this example, let’s create …

Read more

How to weld points in Blender

Screen Shot 2016-05-09 at 15.54.22

Sometimes 3D objects are created with duplicate vertices that should be in the same place. Imagine two sides of a cube: ideally they should share the same points, but when you place two planes closely next to each other, they’re just two planes and not one object.

For that we need to “weld” vertices together, an expression shared by pretty much every 3D package – except for Blender, where “being different” is just as important as “being complicated”. In Blender, welding is called “removing doubles”.

Let me show you how to do this – no matter what you want to call it.

Read more

How to apply textures in Blender (Cycles)

Adding textures in Blender depends on which render engine is used. In this article I’ll discuss how to do this for Cycles. I’ll explain how to do this with Blender Render in this article.

First we need to make sure that Cycles is our render engine. Select it at the top of the app. This will change how materials work, so if you’ve got anything interesting setup with Blender Render, you’ll have to rework it all.

Screen Shot 2015-05-10 at 18.12.24

Now select the object you’d like to assign a texture to and find the Materials Tab in the properties palette (it’s the little orange round checkerboard icon). By default the material only has a diffuse colour assigned.

Screen Shot 2015-05-10 at 18.16.28

Under Surface, select Use Nodes. This will require us to work with the Node Editor in another viewport. I understand that there’s a different way to setup materials and textures in Cycles, but I find the Node Editor much easier to grasp. 

Read more

Getting started with UV-Unwrapping in Blender

Unwrapping UVs is tough – no matter in which application (apart from ZBrush perhaps, where everything else is really difficult). Here’s how to get started with UV Unwrapping in Blender.

Load an object and make sure you’re in Edit Mode. This is only allowed with a single object selected. Disable any subsurface or smoothing that’s applied on the object so that we have less vertices to work with.

Next switch to the UV Editing workspace (UV View on the left, 3D view on the right). It looks something like this:

Screen Shot 2015-05-10 at 17.13.19
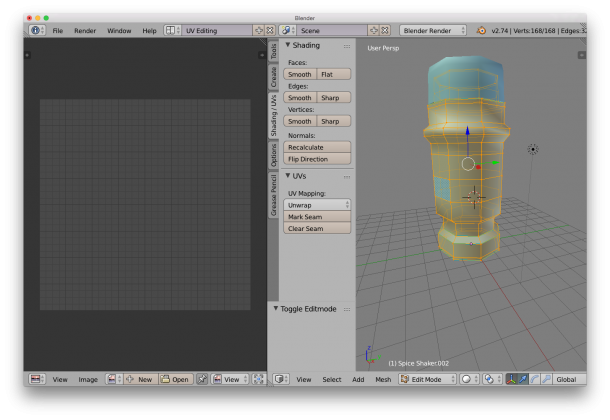
On the right hand side, make sure the Shading/UV tab is showing – it contains some vital tools for this endeavour. Choose edge selection and start marking seams for your unwrap. It’s easy to ALT-RIGHT-CLICK to select edge loops, or use the Select Menu for more funky options. 

Read more

How to reload image textures in Blender

We often have to tweak images in an external application while they’re already applied to a 3D object. To see our changes in action, it is necessary to reload the textures in Blender. Few applications detect such changes automatically (which is sad – because it’s not exactly rocket science to implement this). To do this, change …

Read more

How to use Background Images in Blender

Reference images are helpful for modelling objects or to add simple backgrounds to scenes. There are at least two ways in which we can add them in Blender. Adding Background Images One way to do it is via Background Images. On the tab next to the Properties Palette (expand it with the little plus icon …

Read more

How to use Blender as a simple Render Farm for animations

Blender has a bafflingly simply way to let several computers render the same animation. Render Farms are usually setup in a way that one machine is the “master”, and the others are declared “render slaves” that each render a single frame or even a single bucket of a frame. The master then assembles everything into a …

Read more