DAZ Studio Archives

3D manipulation tool for rendering people.

How to avoid missing textures in Reality for DAZ Studio

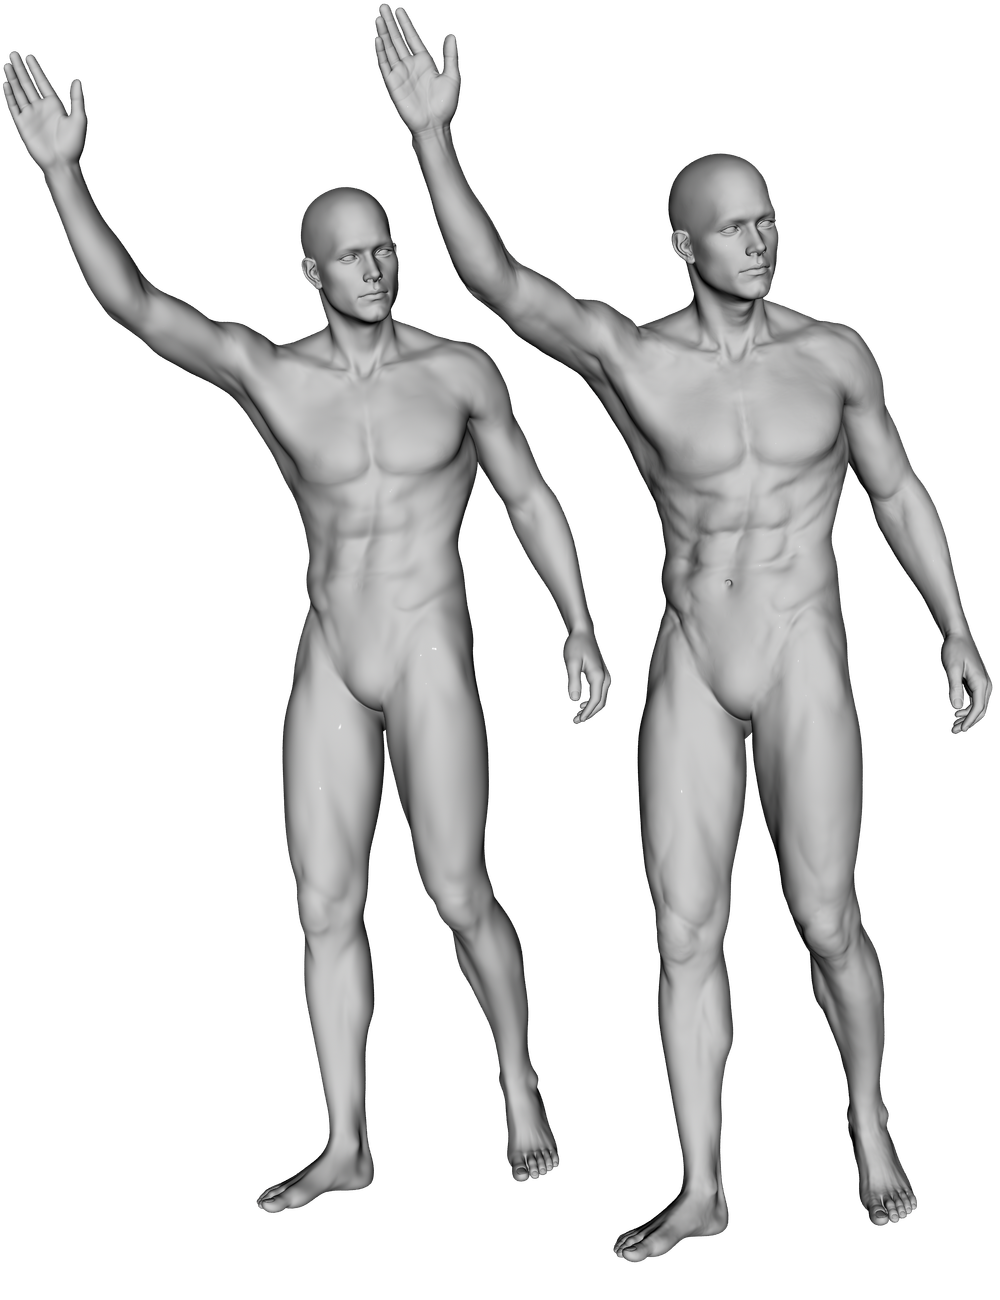
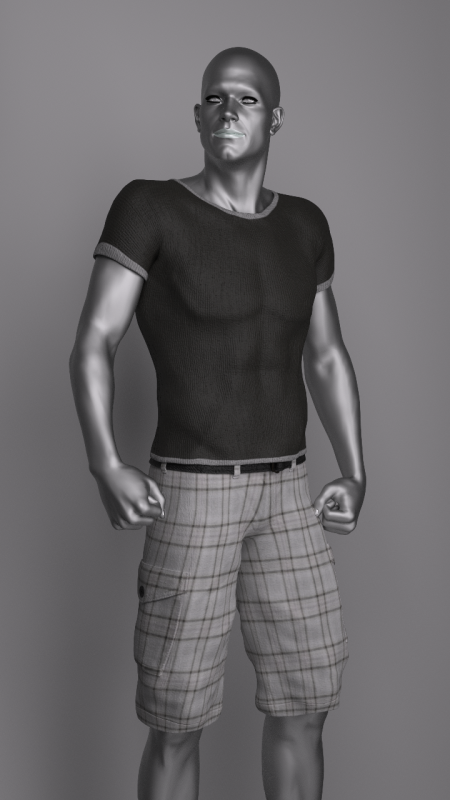
I was playing around with Reality for DAZ Studio the other day, and the above phenomenon occurred. It’s a Michael 6 render that should have worked out of the box – especially because Reality is clever enough to convert his skin shaders to automatically. The render worked fine on one of my machines, but not on another.

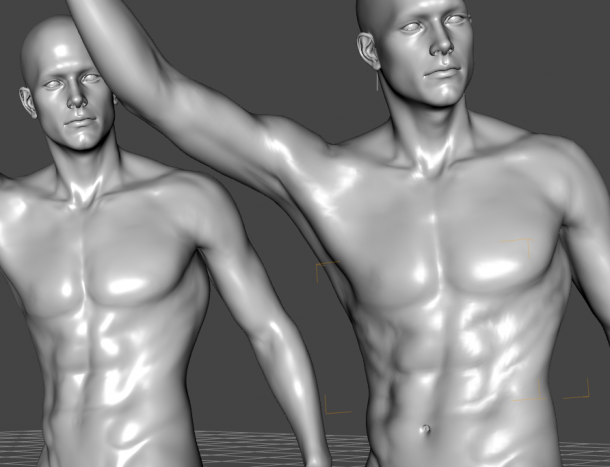
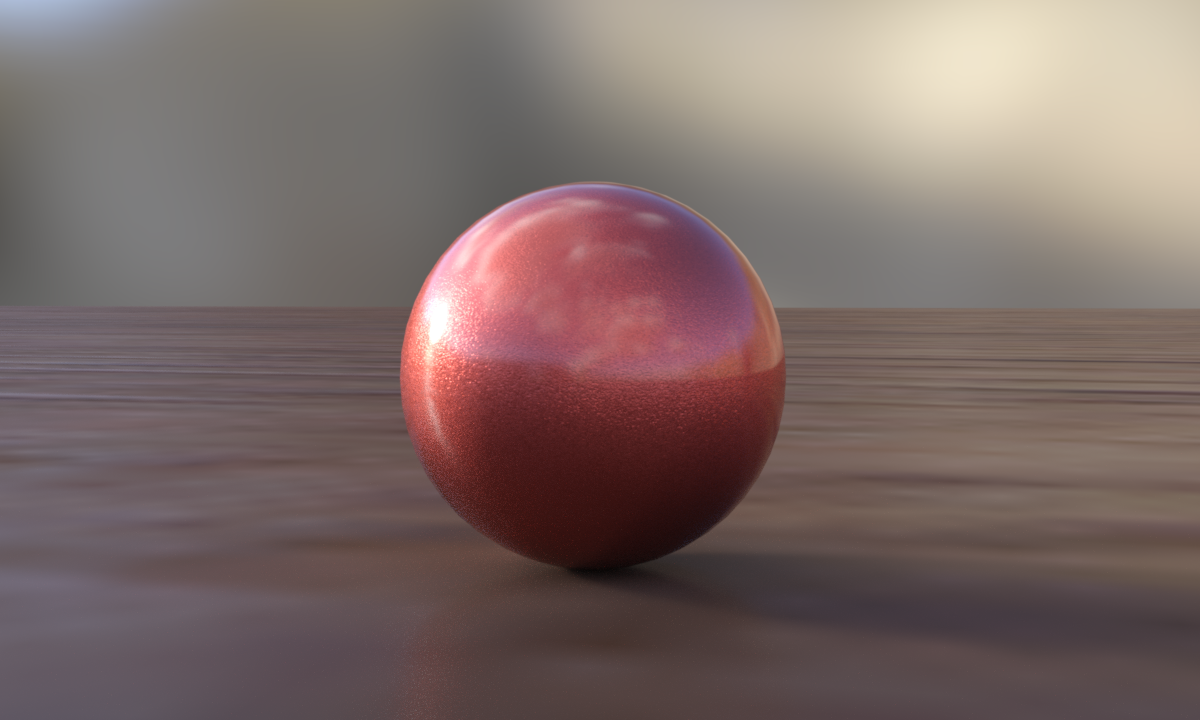
Strangely enough though, I could see the textures fine in the viewport. And a quick test render in both 3Delight and Iray showed the textures fine too. But Reality and LuxRender wanted to render the skin tone as some scary metal.

So what’s going on?

The culprit is DAZ Connect. On this second machine, Michael 6 was installed not via the DAZ Install Manager, but from within DAZ Studio via DAZ Connect. This has happened because I loaded the scene (from Dropbox), and DAZ Studio recognised that Michael 6 was not installed, and hence offered to install him for me. I accepted the generous offer, but Reality and LuxRender can’t handle textures installed via DAZ Connect.

Read more

How to use Spotlights with NVIDIA Iray in DAZ Studio

The NVIDIA Iray render engine can be a bit of a mysterious box sometimes. Especially when it comes to lighting. But it doesn’t have to be. Let’s see how we can add a standard spotlight to our scene and set it up so we can use it properly with Iray.

Let’s take this simple scene as as demo and a staring point. It’s a there and a plane, both of which have Iray shaders applied (it’s Walnut on the floor, and orange car paint on the sphere).

Iray Default Light (IBL)

1-iray-default-lights

The default lighting for a new DAZ Studio Iray scene comes with a small HDRI image applied by default, and when we render our scene, we can see the effects of that light source.

Notice that there’s a small specular highlight on the sphere, on the left hand side (a small shots spot). This is the sun’s hotspot from the HDRI image map. As you turn the camera around, the hotspot moves. Alternatively you can move the Iray Dome to move that hotspot (under Render Settings – Environment – Dome – Dome Rotation).

Not every HDRI image has a sun though, and depending on which map you use, you may not even see such a hotspot in your renders.

Adding a Spotlight

The left hand side of our sphere is a little darker, and if this was a character’s face, we may want to brighten it up a bit. In 3Delight we’d just add a standard spotlight, tweak the intensity and shadows until we’re happy, and then we’re done with it. With Iray we’ll do the same thing – but the settings are just a little different.

Read more

Combining a DAZ Studio Render and a background image in Photoshop

In this episode I’ll show you how to render an image in DAZ Studio and compose it onto a background image in Photoshop. We’ll use the Shader Mixer and a Shadow Catcher to make the figure cast a shadow but be otherwise transparent in DAZ Studio. In Photoshop we’ll add artificial depth of field to …

Read more

How to rename Parameter Dials in DAZ Studio

screen-shot-2016-11-17-at-18-22-57

Parameter Dials are everywhere in DAZ Studio. But sometimes they’re not in the right place, or they’re not called what we’d like them to be called. For example, if you bring in a Morph Target via Morph Loader, DAZ Studio will create a folder by that same name.

It’s easy to change most Parameter Dials. Here’s how to do it.

Read more

Rendering with Depth of Field in DAZ Studio

In this episode I’ll explain how to render a camera with depth of field in DAZ Studio 4.9. The assets I’m using are available from DAZ 3D, they’re called BC Movie Stands “The Office” by The Ant Farm.  For Branson. https://www.versluis.com/wp-content/uploads/2018/08/Rendering-with-Depth-of-Field-in-DAZ-Studio.mp3Podcast: Download (Duration: 30:30 — 27.9MB)

LILIKOI Textures – now available at Renderosity

Here’s another texture set I’ve made for the wonderful Cathy Outfit by outoftouch. I call them LILIKOI. It means “passion fruit” in Hawaiian. Very fitting I thought! LILIKOI contains a total of 20 texture presets for DAZ Studio, 10 for NVIDIA Iray and 10 for 3Delight. You can mix and match any skirt with any top for a total of 100 …

Read more

EQUINOX Textures – now available at Renderosity

I’ve just released a new texture pack, this time for the very versatile Strapless Mini Dress for Genesis 3 and Victoria 7, by hameleon and santuziy78. EQUINOX contains a total of 40 texture presets for DAZ Studio, 20 for NVIDIA Iray and 20 for 3Delight. I’ve added presets for the whole dress, as well as separate presets for the …

Read more

SYMPHONY Textures – now available at Renderosity

Here’s a texture set I’ve made for Jolina’s Swimsuit by outoftouch. SYMPHONY Textures is a set of 16 Material Presets for DAZ Studio, 8 for NVIDIA Iray and 8 for 3Delight. All maps are 4000×4000 pixels, ideal for ultra high resolution renders. Installation and Usage Unpack all ZIP files into your Poser/DAZ directory. Load a figure, …

Read more

COOL BREEZE Textures – now available at Renderosity

Here’s a texture set I’ve made for the Jolina Dress by my friends from Rotenburg and der Wümme, outoftouch. Although we don’t actually know each other, I feel a special connection because I used to live in Verden an der Aller, which is a mere stones throw away from Rotenburg. It’s a small world! The …

Read more

How to fix “The interface of shader xxx is invalid” in DAZ Studio

Sometimes, the 3Delight render engine in DAZ Studio can throw a hissy-fit and complain with the following error message: 3Delight message #45 (Severity 2): S2069: the interface of shader ‘/Users/versluis/Library/Application Support/DAZ 3D/Studio4/temp/shaders/brickyard/{407f8e5c-3a9b-4708-b5e5-799ff1fe7c1d}/shader_Surface.sdl’ is invalid 3Delight message #45 (Severity 2): S2051: cannot load shader ‘brickyard/{407f8e5c-3a9b-4708-b5e5-799ff1fe7c1d}/shader_Surface’, will use ‘defaultsurface’ This problem occurs frequently on complex shaders, such …

Read more

My new HP Z600 Workstation

photo-sep-24-16-22-52I’m as excited as a kid in a candy store – because last Monday my new (old) HP Z600 Workstation has arrived! Built and sold to the government in the summer of 2009 for roughly $5000 (give or take a grand), it came to me via an eBay auction for $171 plus postage some seven years later.

Equipped with two Intel Xeon 5560 processors, no hard drive, 4GB of RAM and only a COA sticker for Windows Vista, I had a little bit of work to do to get it all going:

  • get a USB keyboard
  • get a power cord
  • get a graphics card
  • perhaps grab some more RAM
  • find a network cable
  • download a copy of Windows Vista (not easy to find in 2016)

I wanted to use this machine for 3D rendering in both Carrara and DAZ Studio, so for the latter I decided to buy an NVIDIA GTX 970 graphics card. I had to do a few internal modifications to the machine to make it work – but work it does, and it was a lot of fun to get this rig going.

Without further ado, here’s my Z600 story.

Read more

How to create a Smart Prop in DAZ Studio

Smart Props are little items of geometry that can follow another object without the need to be completely rigged – unlike conforming clothes, which need to have the same skeleton and rigging as the parent figure. Smart Props are great for things like jewellery and other ancillary items. Let’s see how we can create one …

Read more

How to create Poser Companion Files in DAZ Studio

screen-shot-2016-09-08-at-16-47-21When the Genesis figure was released in 2011, it was not natively compatible with Poser and only worked in DAZ Studio.

Shortly after its release though, the folks at DAZ came up with a way to make Genesis and related content available in Poser, called the DSON Importer – a script that reads the DAZ Studio files and translates them on-the-fly into something Poser can understand.

It’s not perfect, but it works with both Genesis 1 and Genesis 2 figures – as well as related content, provided that so called Poser Companion Files exist. The good news is that DAZ Studio can create those files with minimal effort – if you know how to do it.

Let me show you how in this article, which was inspired by a forum thread over at HiveWire.

Read more

How to suppress the “Incoming Network Connections” Dialogue for DAZ Apps on your Mac

Screen-Shot-2015-06-02-at-08.28.12

Mac Users will be familiar with the above dialogue. If you have DAZ Studio, Install Manager and/or Carrara installed, this thing shows up several times during your working day:

  • when you start your computer
  • when you launch Install Manager
  • when you launch DAZ Studio
  • when you launch Carrara

Should this drive you crazy, then read on – because there is indeed a solution to this! It has to do with a bit of command line hacking and location scouting. But if you’re clever enough to figure out such complex 3D applications, the following steps will seem like a walk in the park to you.

The following steps worked for me on OS X El Capitan 10.11.6, DAZ Studio 4.9 and Carrara 8.5 Pro.

Read more

How to use the Photoshop 3D Bridge in DAZ Studio

In this video I’ll show you how to use the Photoshop 3D Bridge in DAZ Studio 4.9.

It’s a little clunky and a little old school, but it can still be a helpful tool to either render a scene from DAZ Studio directly into Photoshop for compositing, or exchange texture maps for easy changes and amendments. I’ll also discuss how to bring a whole 3D scene into Photoshop and add a few troubleshooting tips.

But I know that videos aren’t for everybody, so I thought I’d also add some written instructions here for good measure.

Read more

How to install 3D Content from a ZIP Archive on Mac OS X

Alt-Drag-and-Drop

Dealing with ZIP files from 3D content marketplaces isn’t easy. I’ve been asked several times how to install such content, and thought this article may come in handy for future generations.

The principle is the same on Mac and Windows, however it’s slightly more tricky on a Mac because it wants to replace the whole folder rather than merge it. We’ll see how to deal with this peculiarity and have our content installed in no time!

Read more

How to apply Subdivision Surfaces in DAZ Studio

Screen Shot 2016-04-27 at 22.37.50

I was modelling a chair in ZBrush the other day and wanted to bring it into DAZ Studio for rendering. So I exported my chair as OBJ from ZBrush, imported it into DAZ Studio and was slightly surprised by the result: it looked more edgy, and not as smooth as it appeared in ZBrush.

Why was that, I wondered, and – more importantly – how could I fix that?

The secret sauce is called Subdivision Surfaces (SubD) and it’s easy to add to any object or figure that doesn’t already have it applied. Let me show you how to do this in DAZ Studio 4.8.

Read more

Say hello to Victoria 7

Victoria-7

Victoria 7 is here! According to the marketing hype she’s “totally amazing”, but we don’t know much about her yet. Feeling finally better, I thought I’d give the new girl a spin and see how DAZ have improved upon the previous generation of Genesis 2 (which – let’s face it – wasn’t shabby at all).

New figures are fun to play with, and I’m sure over the next two years we’ll find out more about Genesis 3 than we will in the first few days. Here’s what I’ve found so far.

Read more

How to preview HD Morphs in DAZ Studio

Michaels

In the above picture we have a render of Michael 6, the standard version on the left and the HD version on the right. Zooming in closer we can see that his abs and knees for example have a lot more detail – as we’d expect from an HD version of a model.

Comparing the two Michaels in our viewport instead of the render however, we can barely make out a difference. Both figures look nearly identical (except for the belly button indentation perhaps).


Screen Shot 2015-07-07 at 12.59.33

So why is that, and how can we preview those HD details before we render them?

The secret lies in our viewport’s subdivision levels.

Read more

How to change the launch image in DAZ Studio

Did you know that you can change the splash screen / launch image that comes up when you start DAZ Studio? It’s nothing major of course, but just in case you find the default image too distracting you can make DAZ Studio launch with something more plain, as pictured above. Head over to Preferences – …

Read more

How to enable Hardware Acceleration in DAZ Studio

Are the viewport movements in DAZ Studio getting you down? Does it seemingly take forever to make a small camera adjustment, despite your decent hardware? Check if Hardware Acceleration is enabled – because it isn’t by default. They do this so that most hardware will work with DAZ Studio out of the box, but they don’t …

Read more

How to reduce the Depth-Of-Field frost effect in DAZ Studio

Something that’s always been bugging me is the “frost effect” that DAZ Studio introduces on renders with depth of field. The above picture is a perfect example of it. Where does it come from, and how can we avoid it? I’ve mentioned two approaches in an earlier article that discusses how to setup depth of …

Read more

How to render DAZ Studio RIB Files on another computer

I have previously described how to render DAZ Studio Scenes without DAZ Studio. This is done by rendering to a RIB File (RenderMan Interface Bytestream), using the standalone 3Delight Studio to create the final render. The procedure frees DAZ Studio up and allows you to work on your next scene without having to wait for the render to finish.

I generally use Xender for PC for my file transfer needs, but I’ve been looking for ways to transfer such RIB files to another computer which does not have the content or even DAZ Studio installed, and I think I’ve found another one!

When used as described in my previous article, DAZ Studio creates a RIB file that references temporary files as well files on the local system. Neither of those can be used on a different computer because they most certainly don’t exist. This means your render will likely be missing a few textures.

There’s a handy command line tool that will collate all those files needed to render the image. The drawback is that – depending on the size of your scene – this may result in a rather large file (1GB or more). However the approach is great if you’d like to render that super long animation for several weeks without blocking your regular office computer.

Here’s how to do it.

Read more

How to batch render RIB Files on your Mac

If you’ve read my previous article about rendering DAZ Studio files without DAZ Studio, you already know that I’m big fan of batch rendering my images. For this I mainly use the excellent Batch Render Script by Draagonstorm. It allows me to queue up several scenes, and while I do something else, DAZ Studio will load up one after the other and render like a champ.

Windows users have a special treat that can have the same script create a .bat file, allowing the 3Delight standalone renderer to work on a batch of files without using DAZ Studio. Mac users don’t have such luxuries, and will still “block” DAZ Studio until all renders in the batch have finished.

I have good news: for the hackers among us, we can create such a batch queue on the Mac manually, using a simple Shell Script. In this article I’ll show you how to do it. Some Mac/Linux command line experience is necessary to follow along.

Read more

How to render a multi-camera animation in DAZ Studio

When you’re rendering a multi-camera animation, chances are you want to change shots from one camera to another. This means that you have to render your sequence from all camera angles and then employ an editing application to stitch your shots together.

There are several drawbacks to this approach: for one, a lot of render waste will accumulate for the images you don’t want to include in the final animation. Another is the time it takes to render an animation several times – as if one pass doesn’t take long enough already.

Thankfully there’s a free script that can help us render much more efficiently, and create the whole sequence in one pass: it’s called CamSeq by the amazing mCasual / Jaques (thanks, Jaques!)

Here’s how to use the script in DAZ Studio 4.8, step by step.

Read more

How to create keyframe animations in DAZ Studio

Animation

DAZ Studio can handle two types of animation: aniMate aniBlocks, as well as traditional keyframe animations, much like many other 3D applications. The principle of animating objects is very simple, but as a scene becomes more complex you may find that additional tools (such as graphMate and keyMate) may be of help.

Here’s how it works:

  • select an object and set a keyframe (in the Timeline Tab)
  • move the timeline slider to a new position
  • move your object to a new position
  • and set another keyframe

When you move the timeline slider back and forth, DAZ Studio will calculate the movement between the two positions. All aspects of an object are animated, so with cameras it includes the depth of field and focal length, or with lights it would include the intensity. Sometimes you may need to tweak the keyframes, or set additional ones if the calculated motions aren’t working well.

Let’s see how this works with a primitive.

Read more

How to create Material Presets in DAZ Studio

Material Presets in DAZ Studio describe the surfaces of your 3D objects. A simple object may only have one material zone, but more complex objects can have several. These zones are also known as Shading Domains, which are setup when the object is created in a 3D modelling application.

Material Presets are closely related to Shaders, in fact they work with very similar concepts. The difference is that a Shader describes a single surface, whereas a Material Preset describes which Shader is applied to which part of an object, or more accurately, which Shading Domain shall be rendered with which Shader.

While you can apply a Shader to any object’s surface, you cannot necessarily apply any Material Preset to any object: Material Presets are object specific, whereas Shaders are not.

Let’s take a closer look at Material Presets in DAZ Studio, how to set them up and how to save them to your library.

Read more