I’ve been playing with a new title sequence for shiny new gaming channel, and I thought it would be fun to have a movie file playing on a plane object that’s seen as a screen in a cinema. I knew this was possible in Blender, but I didn’t quite know how to achieve it. After some tinkering I found out. Let me share my findings with you.
It’s very simple actually: setup a material, including a Texture Node, but instead of an image file, we pick a movie file (or image sequence). That’s really all there’s to it. The difficult part is understanding the settings in the Texture File though.
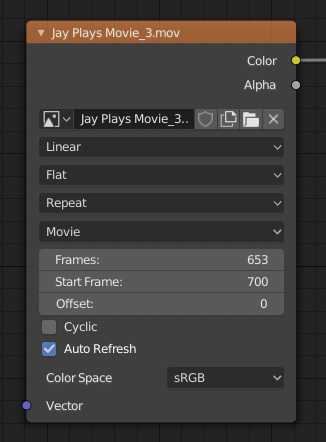
In the fourth drop-down, Movie was selected automatically when I added my movie file. This can be changed to Image or Image Sequence though, just in case yours is not set correctly. For the record, I’m using an MP4 file with H264 encoding, at 60 frames per second. The three following options are interesting (and important).

 I’ve shot some video with my Harinezumi camera when we were in Miami a few weeks ago, and I finally got round to editing it. Julia even dusted off my old electric piano so I could give it a personal soundtrack too.